### 在 Docker 上使用 Jenkins

淨係講下要注意的事情,如果要想要正常運行的話,就一定要用 root 來行 `-u root`,如果唔係會權限不足出問題。

另外要用要用 docker 做 agent 的話 (Jenkinsfile),就首先要去 Jenkins 度裝返好個 plugin 先,有兩個要裝 (Docker, Docker pipeline) 。裝好左之後就要連返個 volumne 等 Jenkins container 都可以拎到 host 個 docker 來用 `-v $(which docker):/usr/bin/docker -v /var/run/docker.sock:/var/run/docker.sock`。裝好左呢度應該都有體上無問題,可以試試 build。

```sh
& docker run \
	-u root \
	-d \
	-p 8080:8080 \
	-v $(which docker):/usr/bin/docker \
	-v jenkins-data:/var/jenkins_home \
	-v /var/run/docker.sock:/var/run/docker.sock \
	-v "$HOME":/home \
	jenkins/jenkins:lts-jdk11
```

### 加返個 GitHub Credential 入度 Jenkins

如果 Jenkins 要由 Github clone project 的話,就可能要加返個 credential 先可以連到,可以去呢度 (下圖) 加返一個,就可以用到。
### 長話短說

用一個簡單的 ? 在 object reference 後面,就可以防止在取得 child property 時因為 undefined object reference 而出現 error。

先睇 code :

```js
// create person object
let person = {
	name: 'Peter',
	age: 10
};

// person age
person.age;
// 10

// set person to undefined
person = undefined;

// person age
person.age;
// error : cannot read properties of undefined

// person age
person?.age;
// undefined (no error)
```
### 長話短說 首先去 terminal 度輸入以下 command 來 generate 條 SSH Key 先。 這個功能有時可能需要在處理 submodule 時使用。 ```sh $ ssh-keygen -t ed25519 -C "your_email@example.com" ``` 新 generate 出來的 key 會放係 ~/.ssh/ 下面,之後我地只要將條 key 既 fingerprint set 入去 Github account 入面就可以。 在右上角的 profile 下找到了 settings : 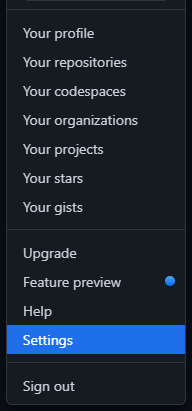 之後去呢度,就可以新增一個 SSH Key : 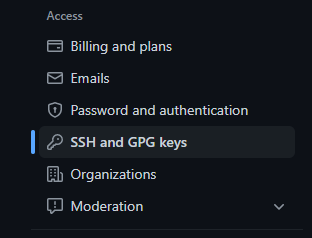 這個用途是當 SSH 連線到 Github 時,就會使用這個 SSH Key 來做認證。
### 長話短說

三句 command 可以搞定

```sh
$ openssl genrsa -out key.pem 2048
$ openssl req -new -sha256 -key key.pem -out csr.pem
$ openssl x509 -req -in csr.pem -signkey key.pem -out cert.pem
```

搞掂,可以用來起住個 development environment 先。
### 在自己的主機上預備

在開發時,有時可能會需要到驗證主機 https 及 DNS 的服務,例如 OAuth 或是 Payment Gateway 等等,

我們可以在自己的主機用以下的 Command 來把自己主機的某一個 Port Tunnel 度 Remote 主機的某一個 Port。

```sh
$ ssh -f -N -T -R 9000:localhost:3000 root@<your-vps-ip>
```

##### -f

把服務在背景運行。

##### -R

是指把 localhost 上,Port 3000 的資料 Tunnel 到 Remote 主機上的 Port 9000 上。

##### root@<your-vps-ip>

目標主機的使用者及地址。

### 在 Remote 主機上預備

可以在 Remote 主機上裝上 Nginx 來進行 reverse proxy。

```sh
$ apt-get update
$ apt-get install nginx
```

然後在 nginx 的 config 設定好 reverse proxy 設定。

開一個新的檔案 `/etc/nginx/site-available/tunnel`,設定以下內容。

```sh
server {
    listen 80;
    location / {
         proxy_pass http://127.0.0.1:9000;
    }
}
```

*** 如果要使用 https 的話,就要裝返張 CERT 同埋 `proxy_pass` 要改返去 https。

在 `/etc/nginx/site-enable` 加入

然後就可以檢查 nginx 設定及重新啟動服務。

```sh
$ nginx -t
$ nginx -s reload
```
### S3

S3 (Simple Storage Service) 是 AWS 其中一個服務,主要用來儲存一些東西,可以是檔案,可以是文字,可以是什麼都可以。

當然雖然佢個名話自己係 simple... 但佢其實真係一 D 都唔 simple。又或者 simple 只係解作佢個功能好單純只係儲存東西。而東西可以被什麼人存取,怎樣寫入,權限等等... 就可以玩到好複雜。

### Cloudfront

Cloudfront 是一個由 AWS 提供的 CDN 服務,可以將你的資源 cache 去佢地既 edge location 度,等每個地區的人都可以用最少既時間去取得佢想要既資源。

### S3 檔案可以在 Public access

每一個放到 S3 的 Object 也是會有自己的 ACL (Access control list) 來控制權限,可以做得到一些很細緻的調整。不過在新版的 S3 內,就加入了 Bucket Policy 這個東西,這個可以說是整個 Bucket 內的權限描述。

不過上面要用到 Bucket Policy 的是有個前設,就是只可以套用到 Object owner 是 Bucket owner 的 Object 上。

我們可以通過 Cloudfront 設立新的 Distribution,在 origin 選取現有的 S3 Bucket。然後設定一個 OAI (Origin access identity),而這個 identity 就可以加入到 S3 的 Bucket Policy 內的 Principal 來限制 Cloudfront 存取 :

```js
"Principal": {
    "AWS": "arn:aws:iam::cloudfront:user/CloudFront Origin Access Identity EH1HDMB1FH2TC"
}
```

這樣就可以無痛把 S3 的內容經 Cloudfront public 出街了。