### Create Bash script

You may simple use the following code to save as a bash script to clear docker log.

```sh
#!/bin/bash -e

if [[ -z $1 ]]; then
    echo "No container specified"
    exit 1
fi

if [[ "$(docker ps -aq -f name=^/${1}$ 2> /dev/null)" == "" ]]; then
    echo "Container \"$1\" does not exist, exiting."
    exit 1
fi

log=$(docker inspect -f '{{.LogPath}}' $1 2> /dev/null)
truncate -s 0 $log
```

### Usage

Use `docker ps` to list each docker container and find their id's.

```sh
$ docker ps
```

Clear docker log by provide docker name as first parameter of the script.

```sh
$ ./docker-clear-log my-nginx-container
```

Enjoy : )
### On AWS To resize the root volume of an EC2 instance, you can do the following steps: 1. Login to AWS console, navigate to "EC2" . 2. Select an instance. 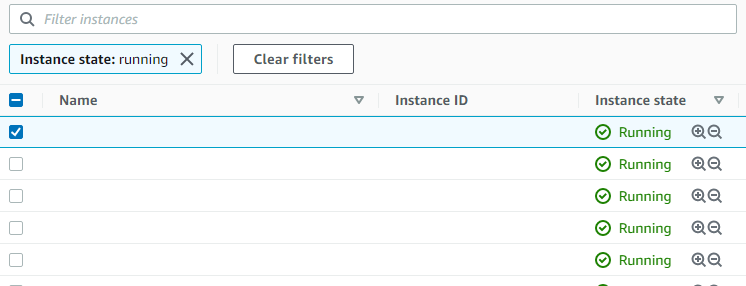 3. Click the "Storage" tab.  4. Click on the volume that you want to resize. 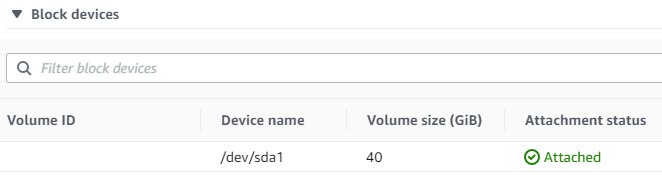 5. Then you may redirected to volumes listing page, select the target volume and click "Action > Modify Volume". 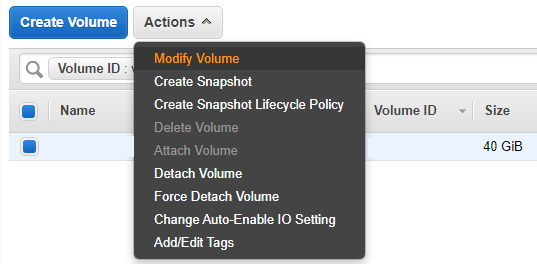 6. Now you may resize the volume. 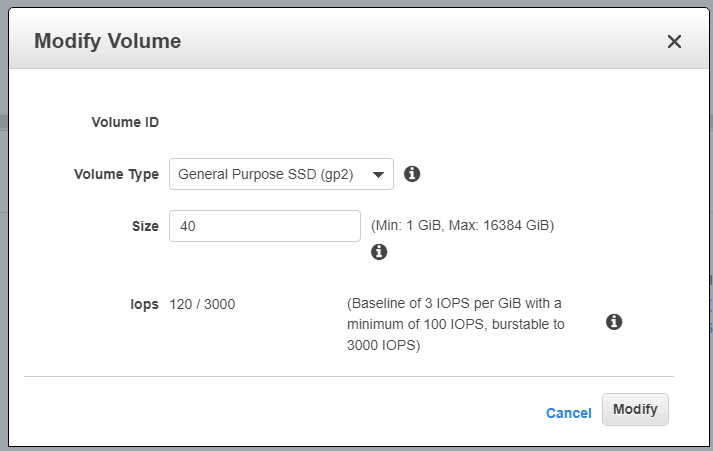 ### On your EC2 instance To take effect on your EC2 instance, you may do some action on you instance: > Reference: https://docs.aws.amazon.com/AWSEC2/latest/UserGuide/recognize-expanded-volume-linux.html#extend-file-system 1. Use `df -h` check the current disk mount points and partition. 2. Use `lsblk` to check disk and partitioning. 3. Use `sudo growpart /dev/xvda 1` to grow the partition to use entire disk spaces. 4. Use `lsblk` to check the result. 5. Use `sudo resize2fs /dev/xvda1` to extend the volume of partition. Enjoy : )
### glogg

glogg 的官方網站

[https://glogg.bonnefon.org/](https://glogg.bonnefon.org/)

這個工具可以開啟數十 GB 的 log file,看似無論檔案多大它好像也能夠開啟 ! 配合使用 Regular Expression 來找出想要看的行數,真的是睇 log 無難度 !
要 Backup MySQL DB 可以有好多種不同的方法,這次是使可比較可以 automate 的方法來進行 Backup 工作。

### mysqldump

mysqldump 其實是一個指令,用來連接 MySQL DB 並把輸出變成為一個 .sql 檔案備份。

以下的指令會完整的備份整個 DB 到 .sql 檔案內。

```sh
$ mysqldump -u {USER} -p -h {HOST} --port={PORT} --databases {DATABASE NAME} > /path/to/backup.sql
```

如果只是想備份 Databse 的架構,而不需要資料的話,可以使用以下的指令。

```sh
$ mysqldump -u {USER} -p -h {HOST} --port={PORT} --no-data --databases {DATABASE NAME} > /path/to/backup.sql
```

主要是加入了 `--no-data` 來達成。
可以通過以下的 CSS 來達成,原理是使用了多重的文字陰影。

```css
.text-border {
	textShadow: '2px 0 0 #FFFFFF, -2px 0 0 #FFFFFF, 0 2px 0 #FFFFFF, 0 -2px 0 #FFFFFF, 1px 1px #FFFFFF, -1px -1px 0 #FFFFFF, 1px -1px 0 #FFFFFF, -1px 1px 0 #FFFFFF';
}
```
當你在 Linux 上啟動 expo service 時,有可能會遇到以下的問題。 > System limit for number of file watchers reached watch expo 原因是因為 Linux 上是使用 `inotify` 來接收檔案變更的事件,以達成 Watch 功能。但是當要 watch 的檔案到達上限時,就會出現上面的 Error。 ### 解決方法 我們可以通過加大 Watch 的檔案數量來解決: 開啟設定檔。 ```sh $ sudo gedit /etc/sysctl.conf ``` 在檔案的最底下加入這句,然後儲存。 ```sh fs.inotify.max_user_watches=524288 ``` 可以用以下指令來查看變更後的情況。 ```sh sudo sysctl -p ``` 完成後就能夠順制啟動了 